
Soundwall Studios
How to use QuickStem 1.1.
Logic Pro, Pro Tools and Ableton Live.
One app for all three. It reads your session, gives you every stem and mix you ask for, then puts your session back exactly as you had it and checks that it did. Here is how, step by step.
Every DAW
Before your first run
Install it.
Open the download and drag QuickStem into Applications. Open it from Applications, not from the disk image, so macOS remembers the permission you are about to give it. QuickStem needs macOS 14 Sonoma or later.
Enter your licence key.
The first screen asks for the key from your email. It starts with QSK1 and is long. Paste the whole thing, line breaks and all, and click Activate. You only do this once.
Trying it first? A trial key gives you four days of QuickStem +, counted from the moment you activate it.
Choose your DAW.
Your key opens the DAWs it was bought for. If you use more than one, QuickStem › Switch DAW… takes you back to the choice. Then follow the section for your DAW below.
The rule for every run
Save your session first, then leave the Mac alone while QuickStem works. QuickStem presses your DAW's controls the way you would. If you click, type or bring another app forward, it stops rather than press the wrong thing. Everything finished so far is kept, and your session is put back.
Logic Pro
QuickStem for Logic Pro
Logic Pro 11 or later.
Turn on Accessibility.
QuickStem reads Logic's Mixer and presses Logic's controls through Accessibility. The first screen checks it and gives you a button that opens the right page in System Settings. Switch QuickStem on there.
Open your song, and open the Mixer as its own window.
Press ⌘2 in Logic for the Mixer window. QuickStem scans and bounces many times faster from it. Make it big: hold Option and click the window's green button. Don't use full screen.
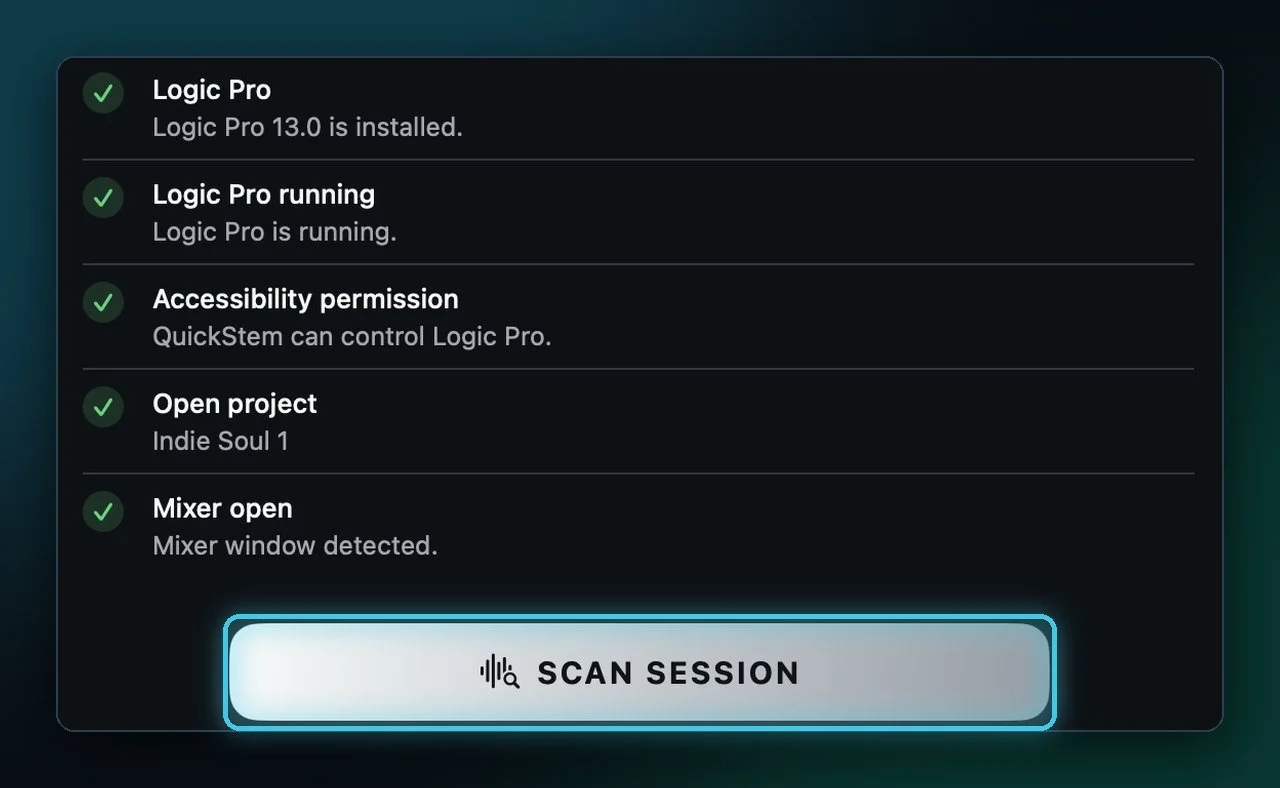
Click Scan Session.
The rows turn green when Logic, your project and the Mixer are ready. A scan takes a few seconds, even on a big session. Nothing is bounced yet.
Review what it found.
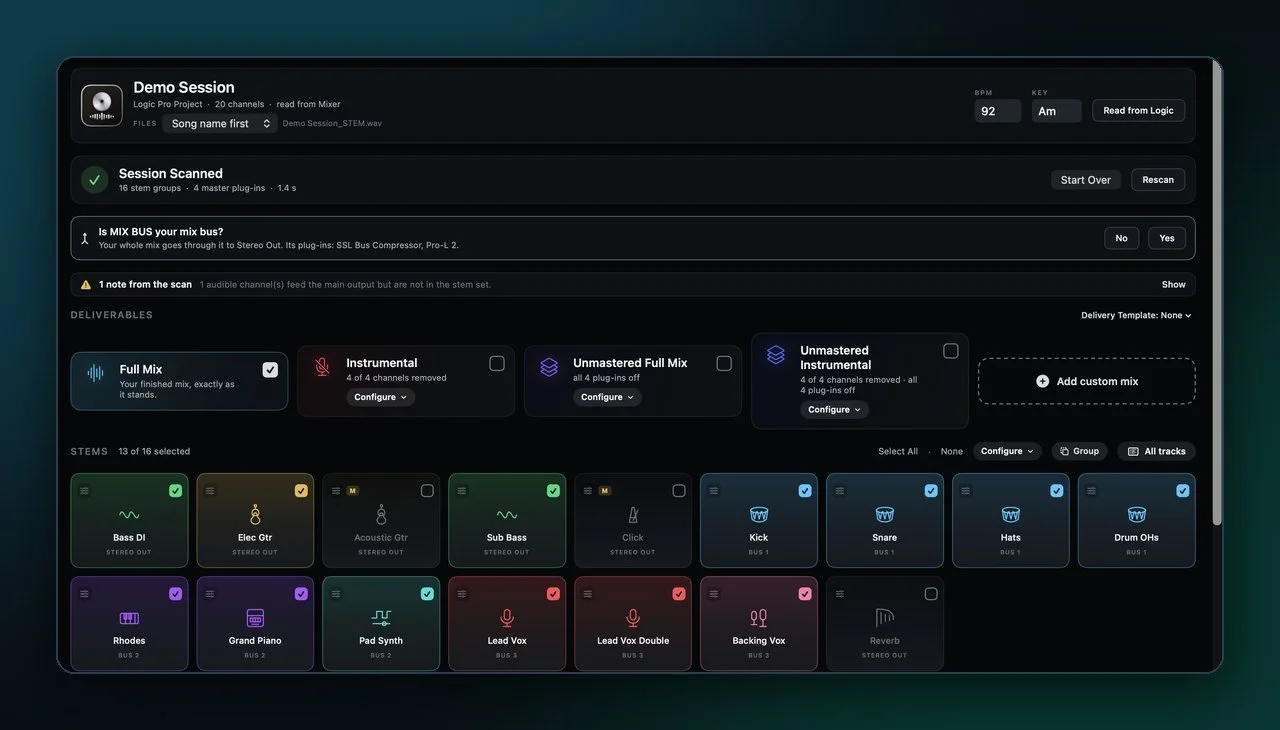
Your stems appear as coloured tiles and your mixes as cards above them. Click a tile to include or leave it out. Double-click to rename it. The title at the top names the delivery folder and every file in it.
Anything worth a look is behind the Notes from the scan bar. None of it stops a bounce.
Answer the mix bus question.
Master on a mix bus instead of your Stereo Out? QuickStem follows your routing, finds it, and asks once. Click Yes and its plug-ins join your master chain everywhere you choose mastering.

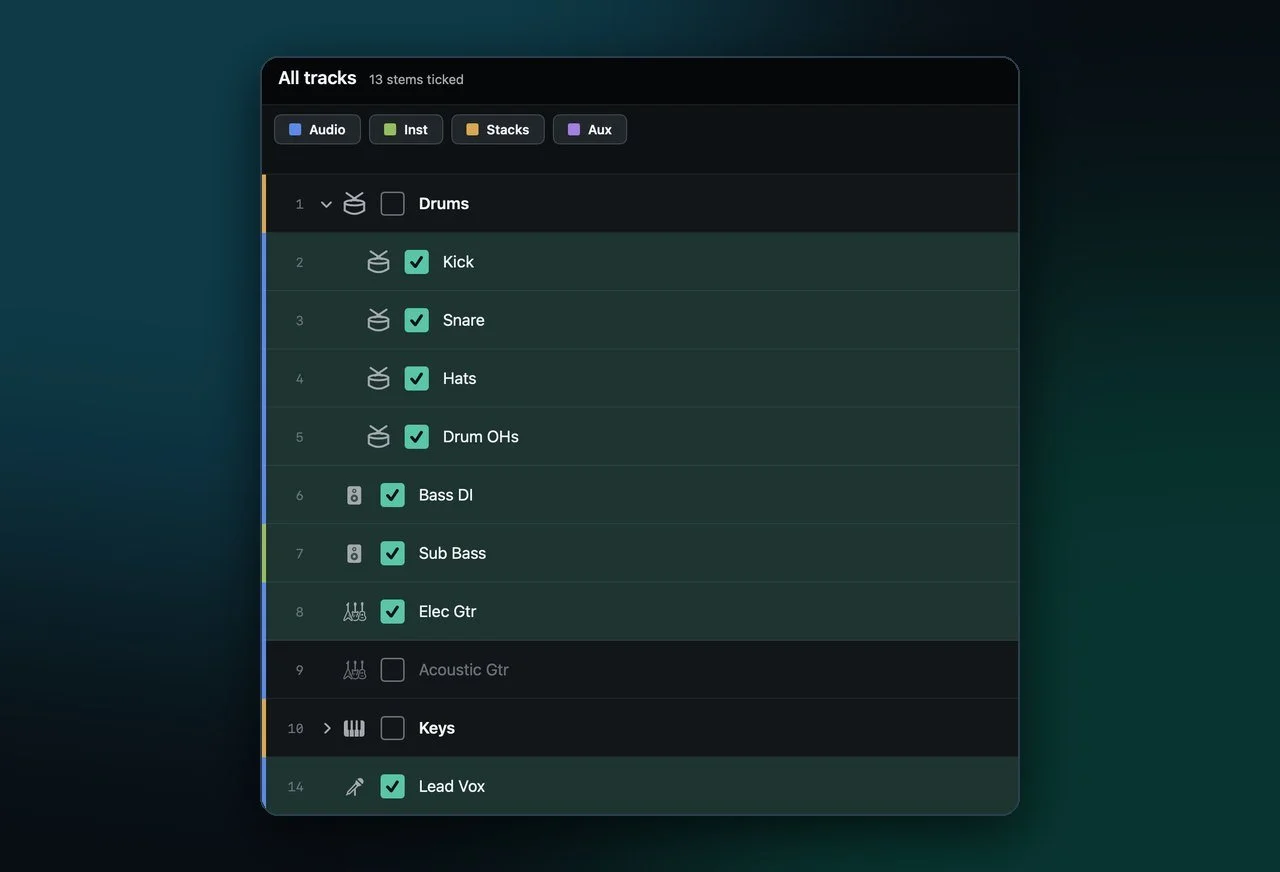
Pick your stems in All tracks.
Click All tracks to see your whole session top to bottom, in Logic's order and colours, with one tick per track. Tick a track to make it a stem. A ticked stack is one stem. Click Done to go back.
Add any custom mixes.
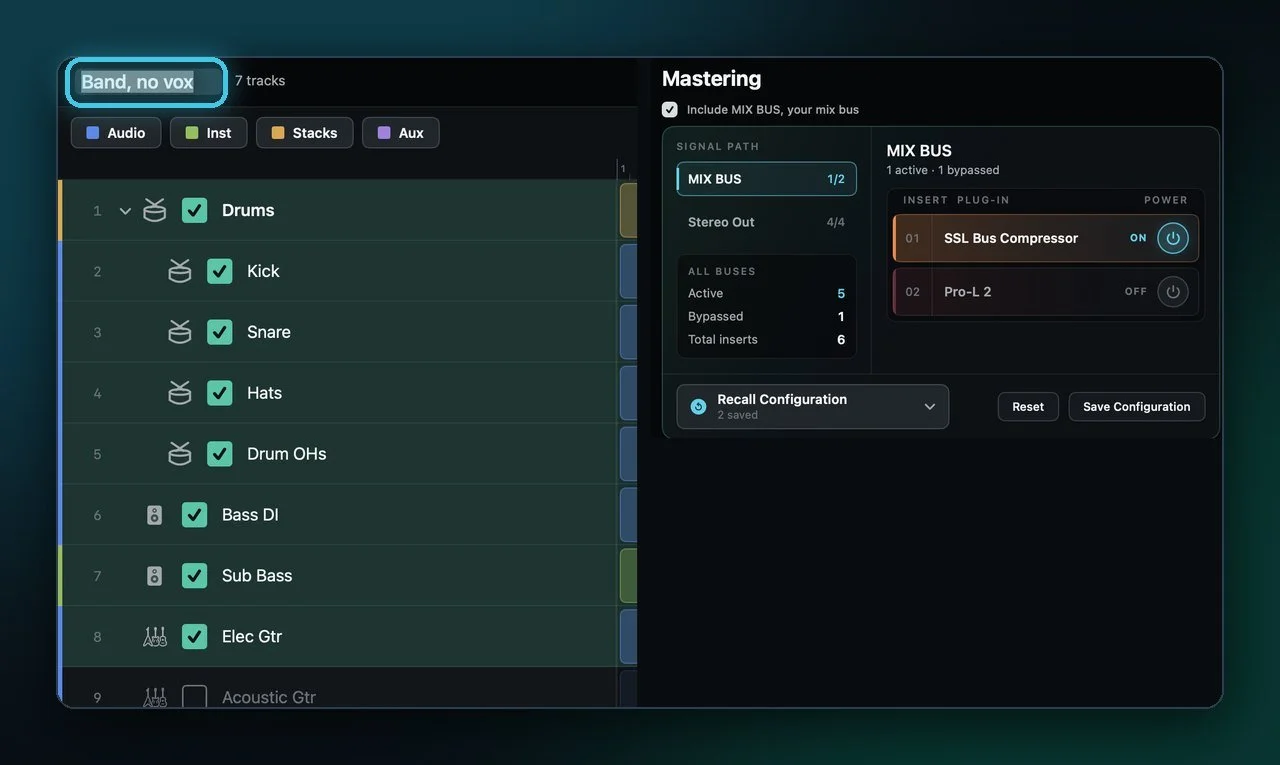
Tick the mixes you need: Instrumental, Full Mix Unmastered and more. For anything else, click Add custom mix, name it, and tick the tracks it plays. "Band, no vox" is one click per track.
Choose the mastering for each file.
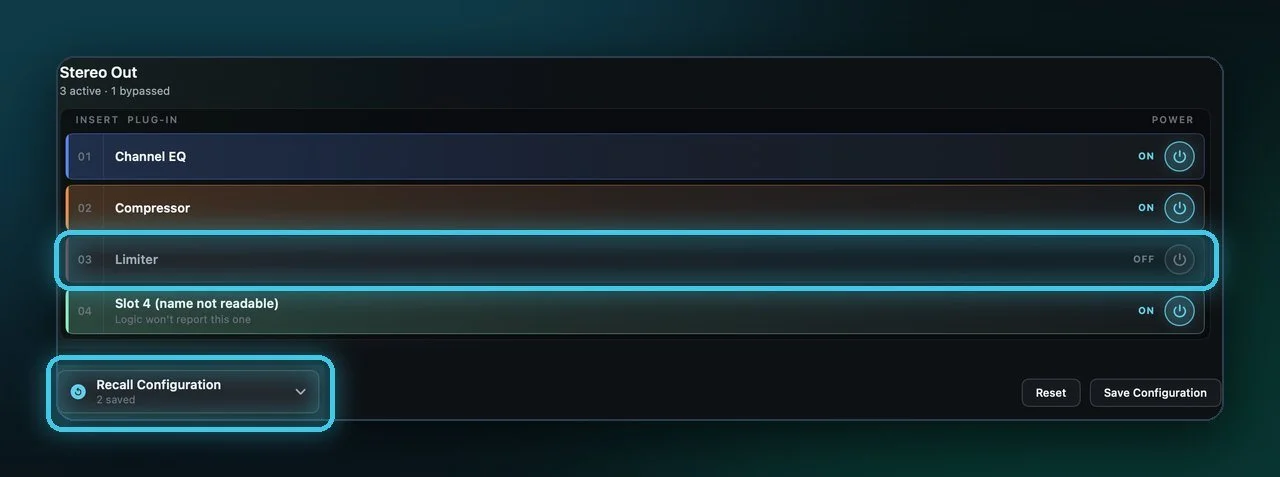
Click Configure on the Stems heading to see every plug-in on your mix bus and Stereo Out, in signal order. Cyan prints, grey is off for that file. Sending stems to a mix engineer? Switch the master chain off here.
Save Configuration keeps the setup. Recall brings it back on any song.
Choose a folder, then Bounce All.
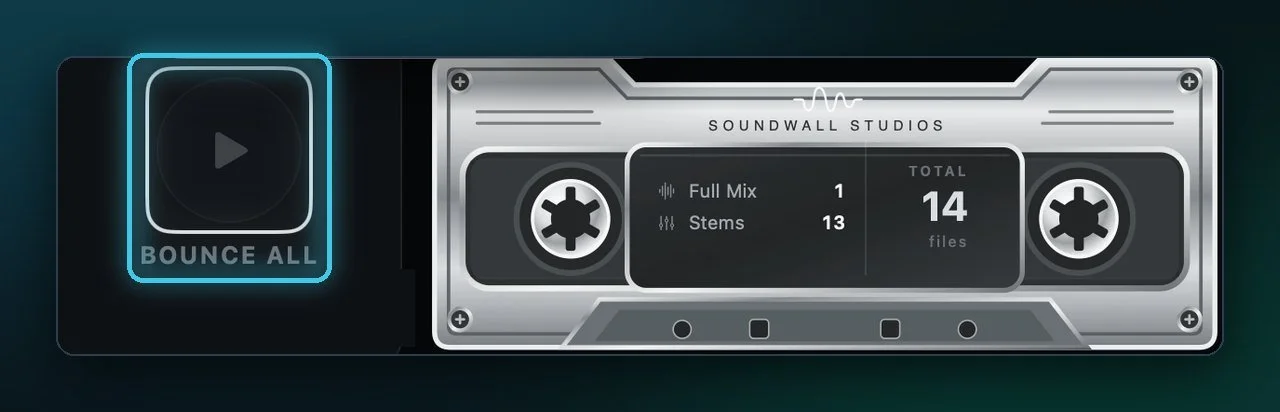
Set the destination and format under Output & Format. Any folder works, Dropbox and iCloud included. Press Bounce All. QuickStem asks you to save first: choose File › Save As… in Logic, then Continue.
A small readout shows which file it is on. If the clock is moving, it is working. Leave the Mac alone until it finishes.
Done.
QuickStem lists every file it wrote. LOGIC UNCHANGED means it proved Logic is back as it started. Show in Finder opens the folder. Start Over takes you to the next song.

QuickStem +
Overnight queue
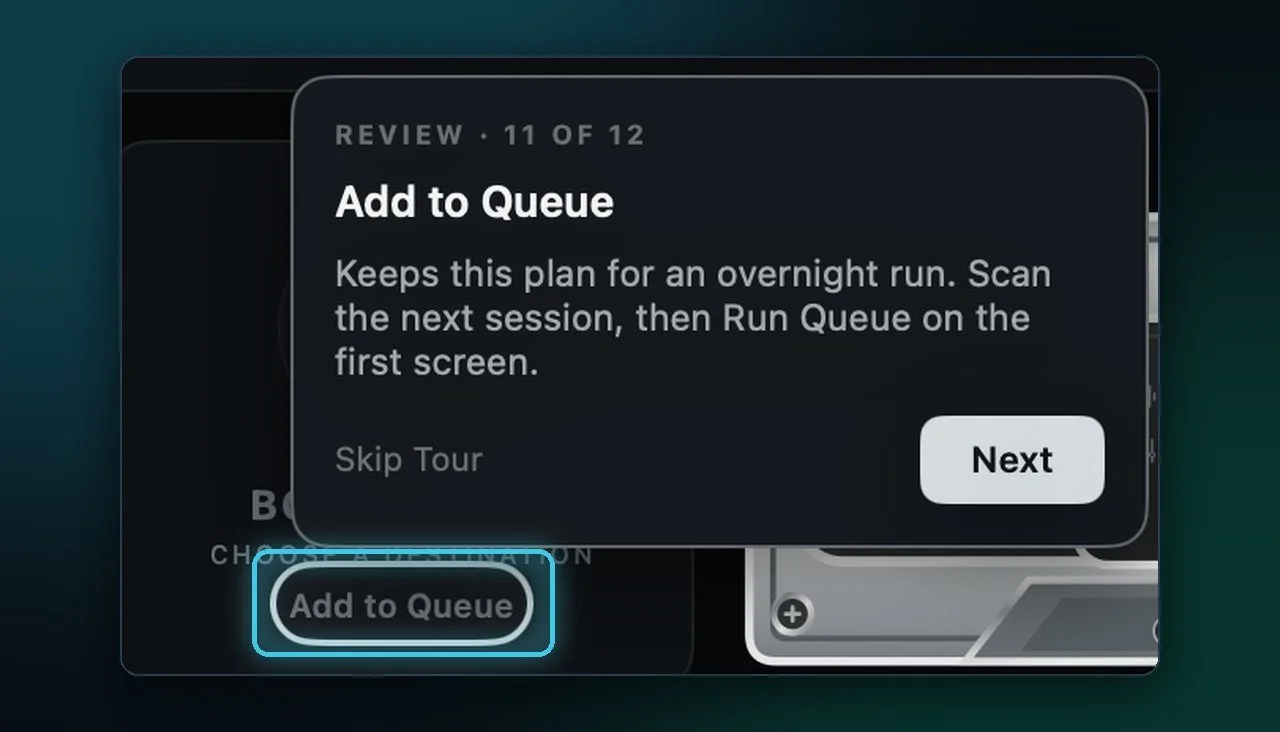
Scan a song, set it up and click Add to Queue. Open the next song and do the same. Then click Run Queue on the first screen and leave the Mac plugged in. QuickStem opens, bounces and closes each project without saving, and leaves you a report. Logic Pro 12 or later.
QuickStem +
Export all tracks as audio files
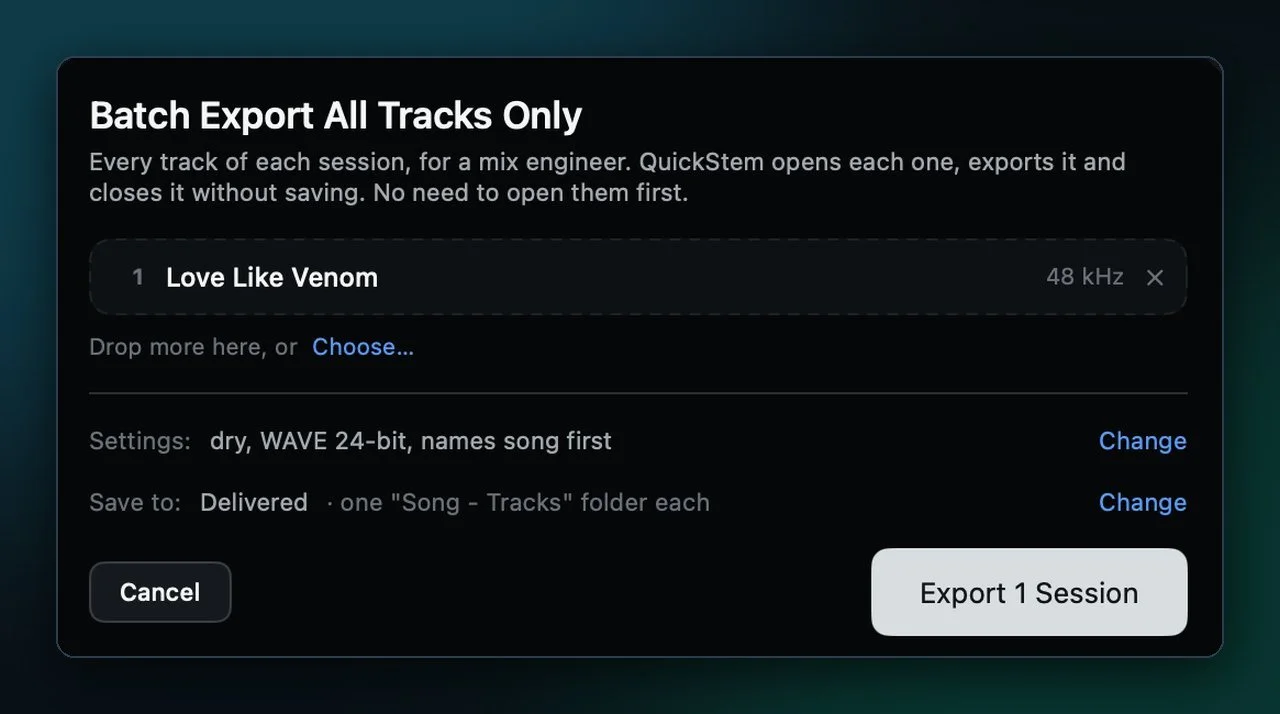
Every track of every song as its own file, ready for a mix engineer. Click Batch Export All Tracks Only on the first screen and drop your sessions in. Set the options once, choose a folder, and press Export. No need to open the sessions first.
Pro Tools
QuickStem for Pro Tools
Pro Tools 2026 or later.
Open your session in Pro Tools.
The first screen checks four things: Pro Tools, Pro Tools running, Pro Tools connection and Open session. Each row turns green when it is ready. If Pro Tools is not running, Open Pro Tools starts it.
The connection row stays red for a while after Pro Tools opens, because Pro Tools only answers once it has finished starting. There is nothing to switch on.
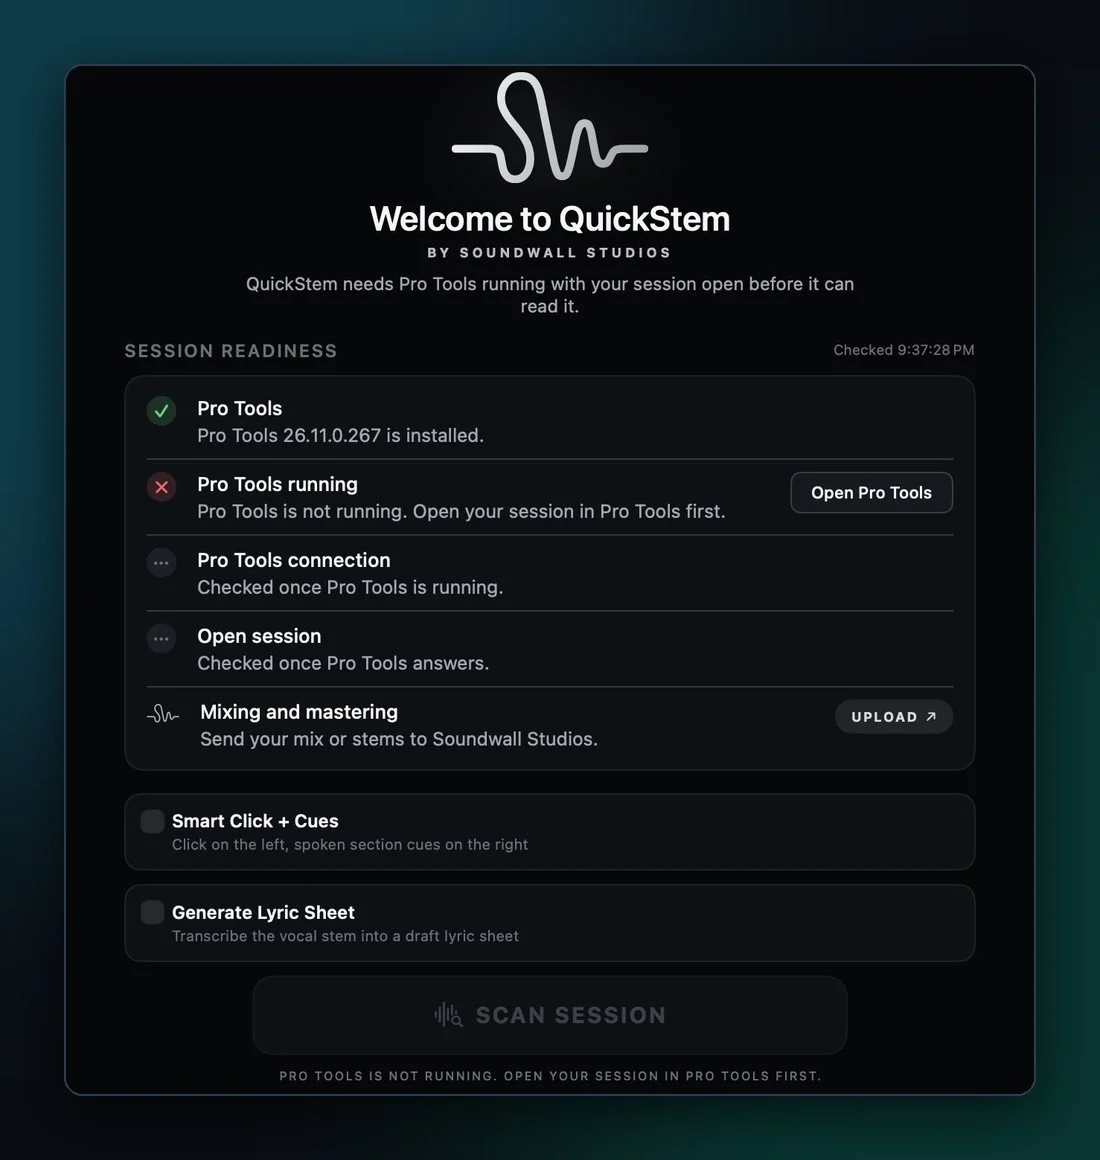
Click Scan Session.
QuickStem reads your tracks, folders, routing and master fader, sorts the tracks into drums, bass, guitars, vocals and so on, and sets the sample rate to the session's. Nothing is bounced yet.
Allow Accessibility when asked.
Pro Tools keeps some routing names in its Mix window. When a session needs them, the Review screen shows Turn On Accessibility…. Switch QuickStem on in the list and it scans again by itself.
Review your stems.
Your folders are the stems. Each folder prints as one file. Tick one to print it, untick it to leave it out. No folders? QuickStem suggests groups by instrument instead.
Want your own groups? Create Stem Group. Want to add anything QuickStem left out? All tracks shows the whole session in Pro Tools order. If QuickStem finds a mix bus, it asks about it here.
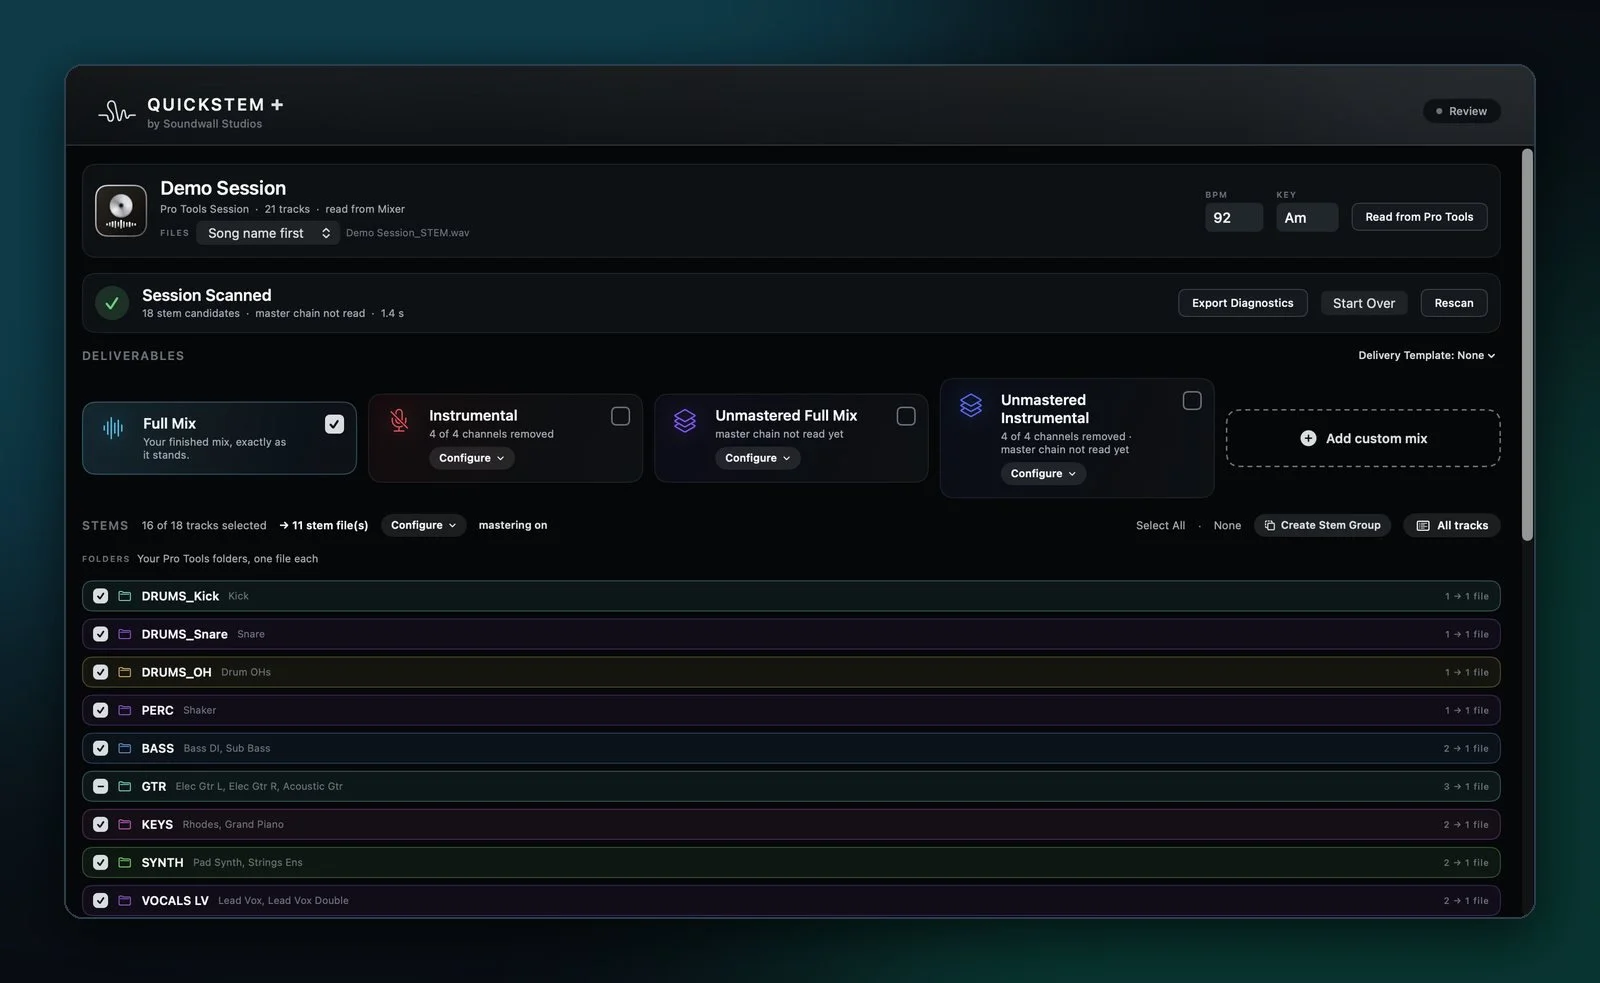
Pick your mixes and format.
Tick the mixes you want under Deliverables, or Add custom mix for your own. Configure on the Stems heading chooses which master plug-ins print on your stems.
Under Output & format, choose a folder, the file type, sample rate, bit depth, and Offline or Realtime bouncing. Offline is the default.
Select the song, then Bounce All.
Pro Tools bounces the timeline selection, so select the song in the timeline, from the start to the end of the last note. Clear any solo. Then press Bounce All.
The first bounce may ask for access to your session's folder. Allow it. Then leave the Mac alone: Pro Tools only switches plug-ins while it is the app in front.
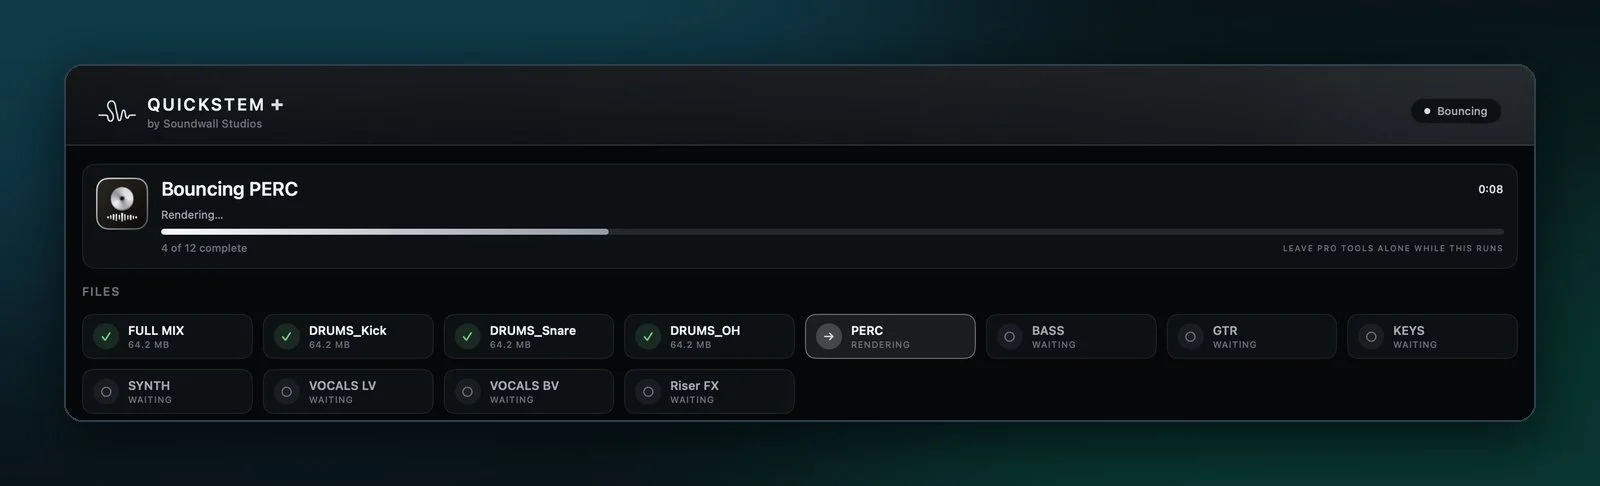
Done.
QuickStem lists what it wrote, folder by folder. PRO TOOLS UNCHANGED means every mute and plug-in was read back as it started. Show in Finder opens the folder.
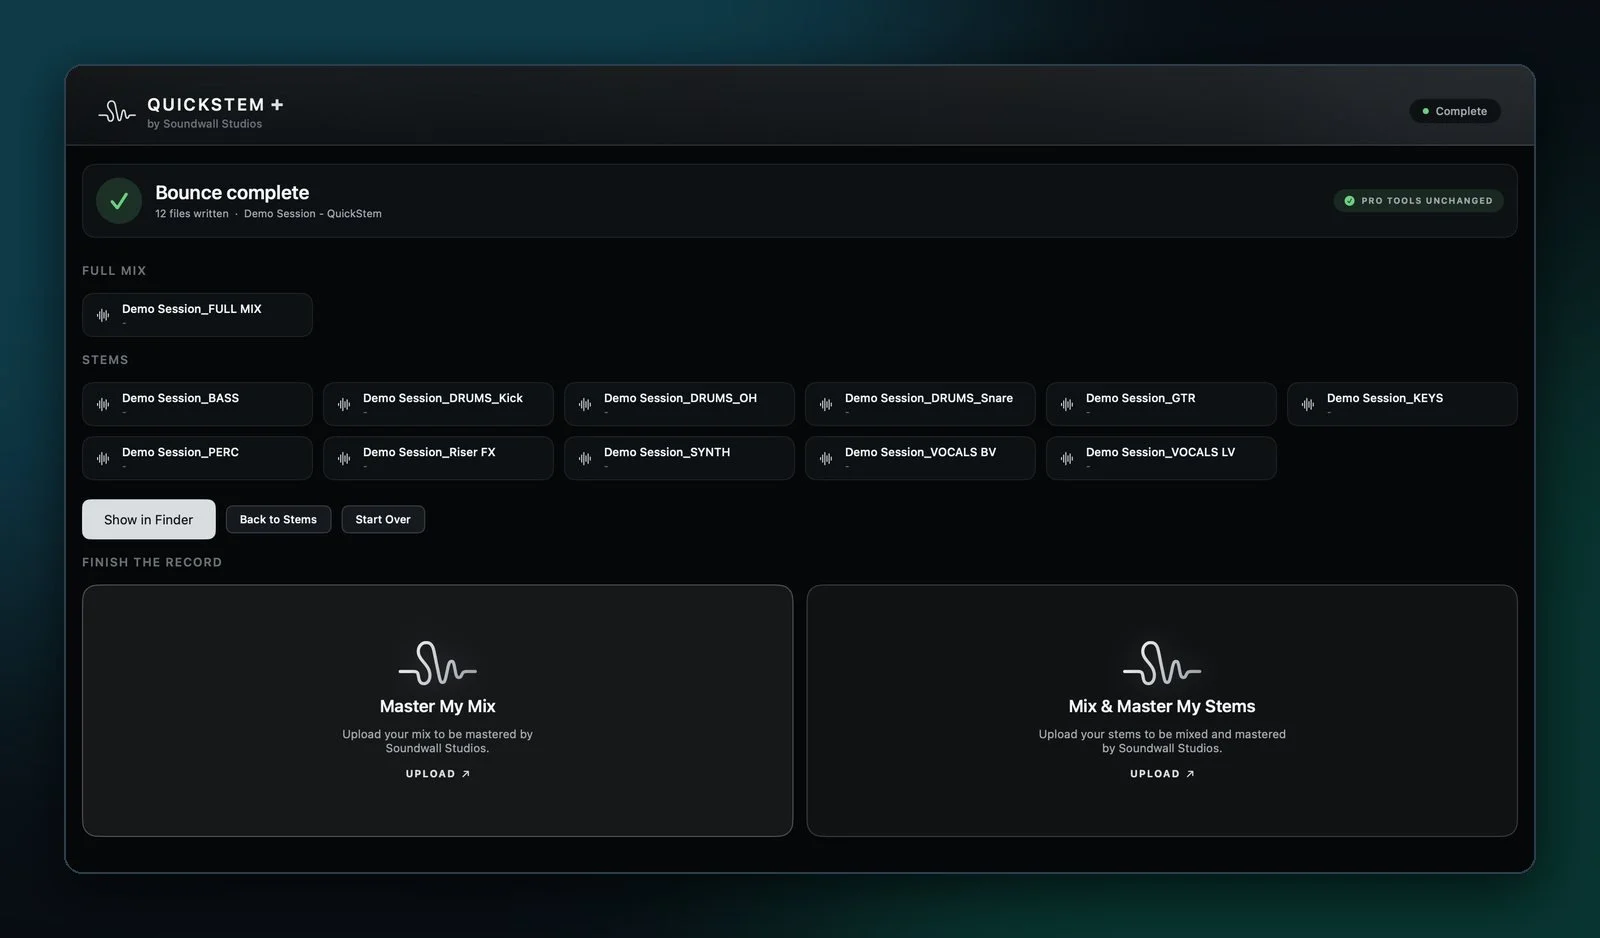
QuickStem +
Overnight queue
Scan a session, set it up, select the song in the timeline, and press Add to Queue. Do the same for each session, then press Run Queue and leave the Mac plugged in and unlocked. QuickStem opens, bounces and closes each session without saving, and leaves you a report.
Ableton Live
QuickStem for Ableton Live
Exports on Live 12.
Turn on Accessibility.
Click Enable Accessibility on the first screen and switch QuickStem on in the list macOS opens. QuickStem uses it to press Live's Export command.
Let QuickStem into Live.
QuickStem talks to Live through a small control surface script, the way a hardware controller does. Restart Live once after installing QuickStem, then click Set Up in Live on the first screen.
By hand: in Live's Settings › Link, Tempo & MIDI, set Control Surface to QuickStem, Input and Output to None. The QuickStem in Live row turns green.
Open your set, save it, and click Scan Session.
Tempo changes and locators are read from the saved set, so save before you scan. QuickStem reads every track, group, return and device, and proposes your stems. Nothing in Live has changed yet.
Review your stems and mixes.
Every stem is a tile. Click to include or leave it out, double-click to rename. All tracks shows your whole set in Live's order and colours; a ticked group track is one stem.
Tick the mixes you want. More mixes adds A Cappella, No Drums, Vocal Up and Vocal Down. Delivering to sets everything for who the files are for: mix engineer, stem mastering, sync library and more.
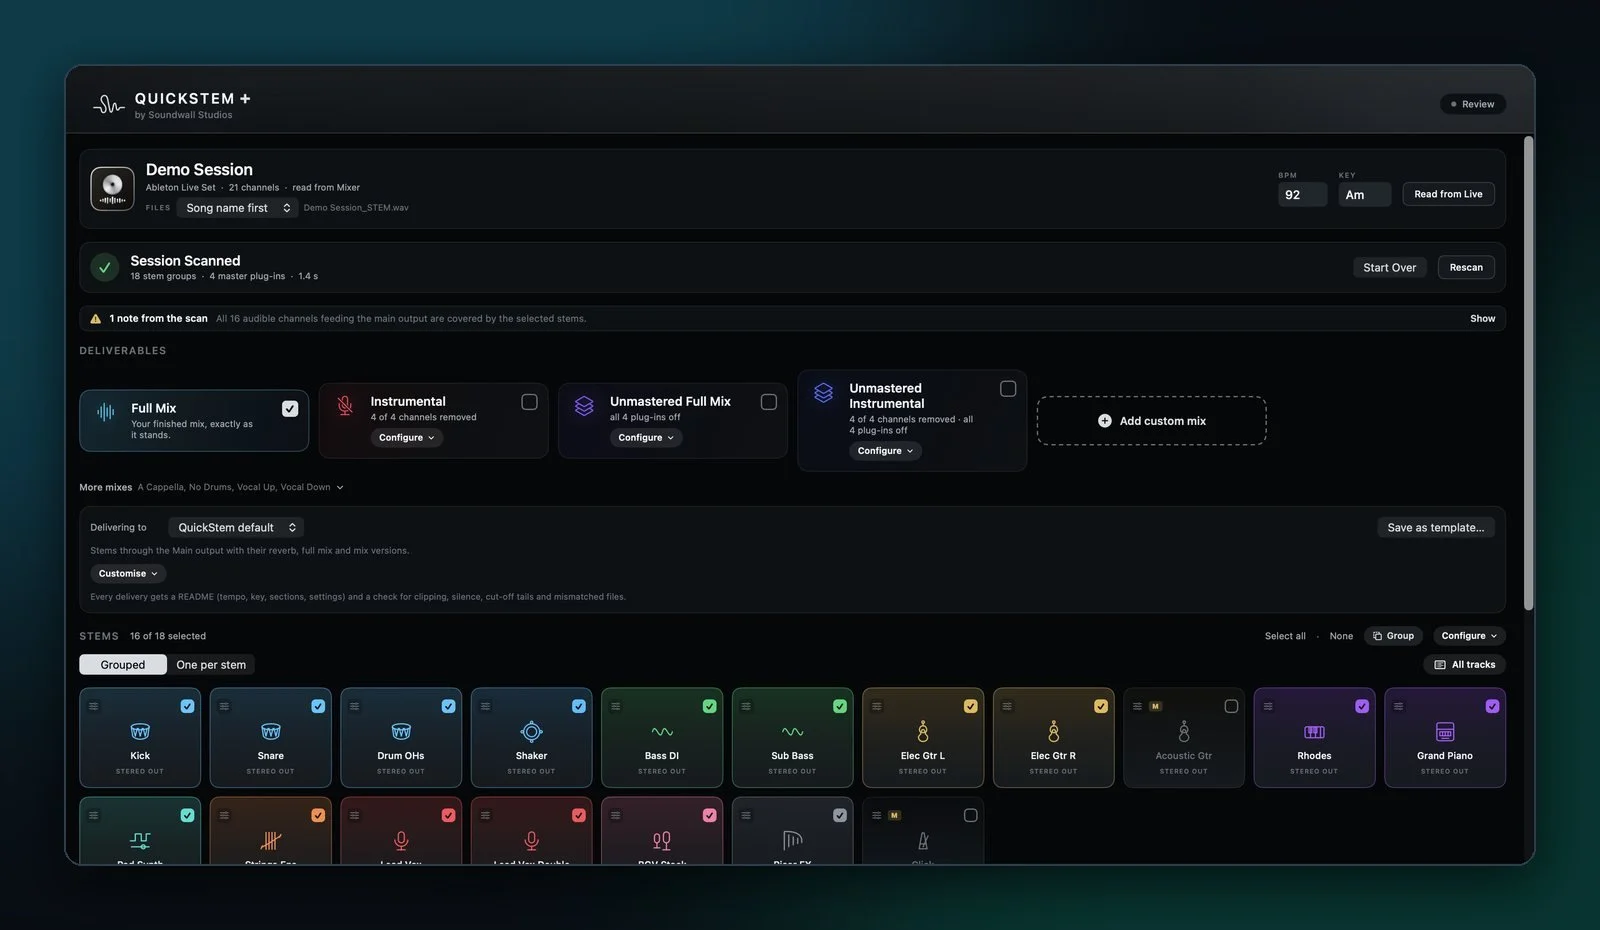
Bounce All.
QuickStem asks you to save first: choose File › Save Live Set As… in Live, then Continue. It types into Live's Export window, so don't click, type or switch apps while it runs.
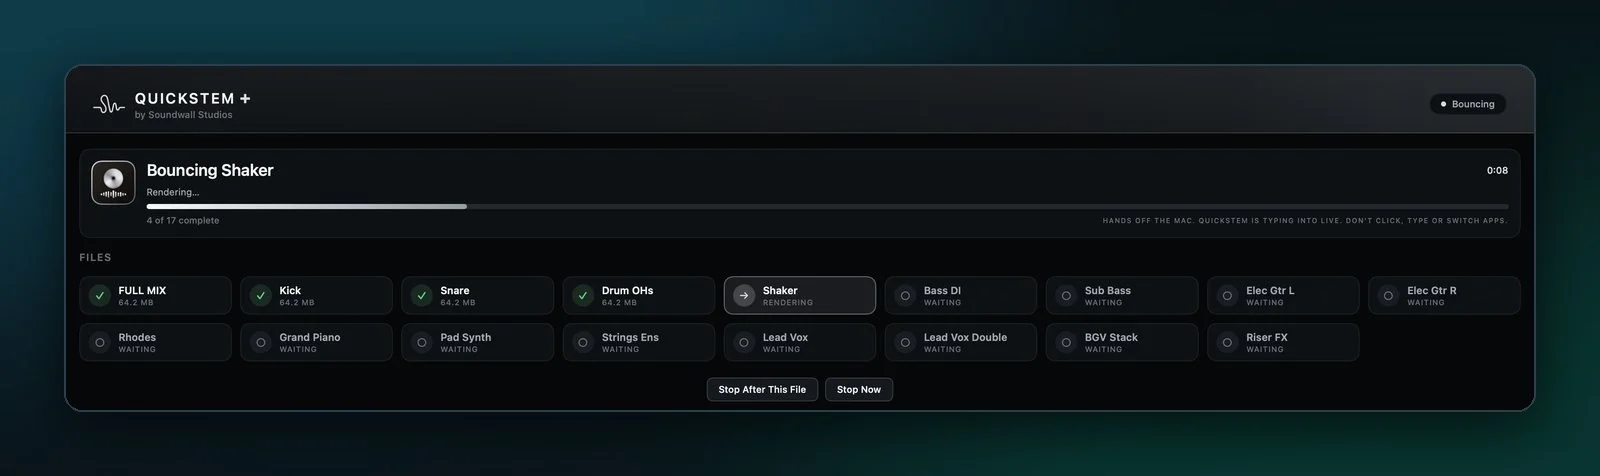
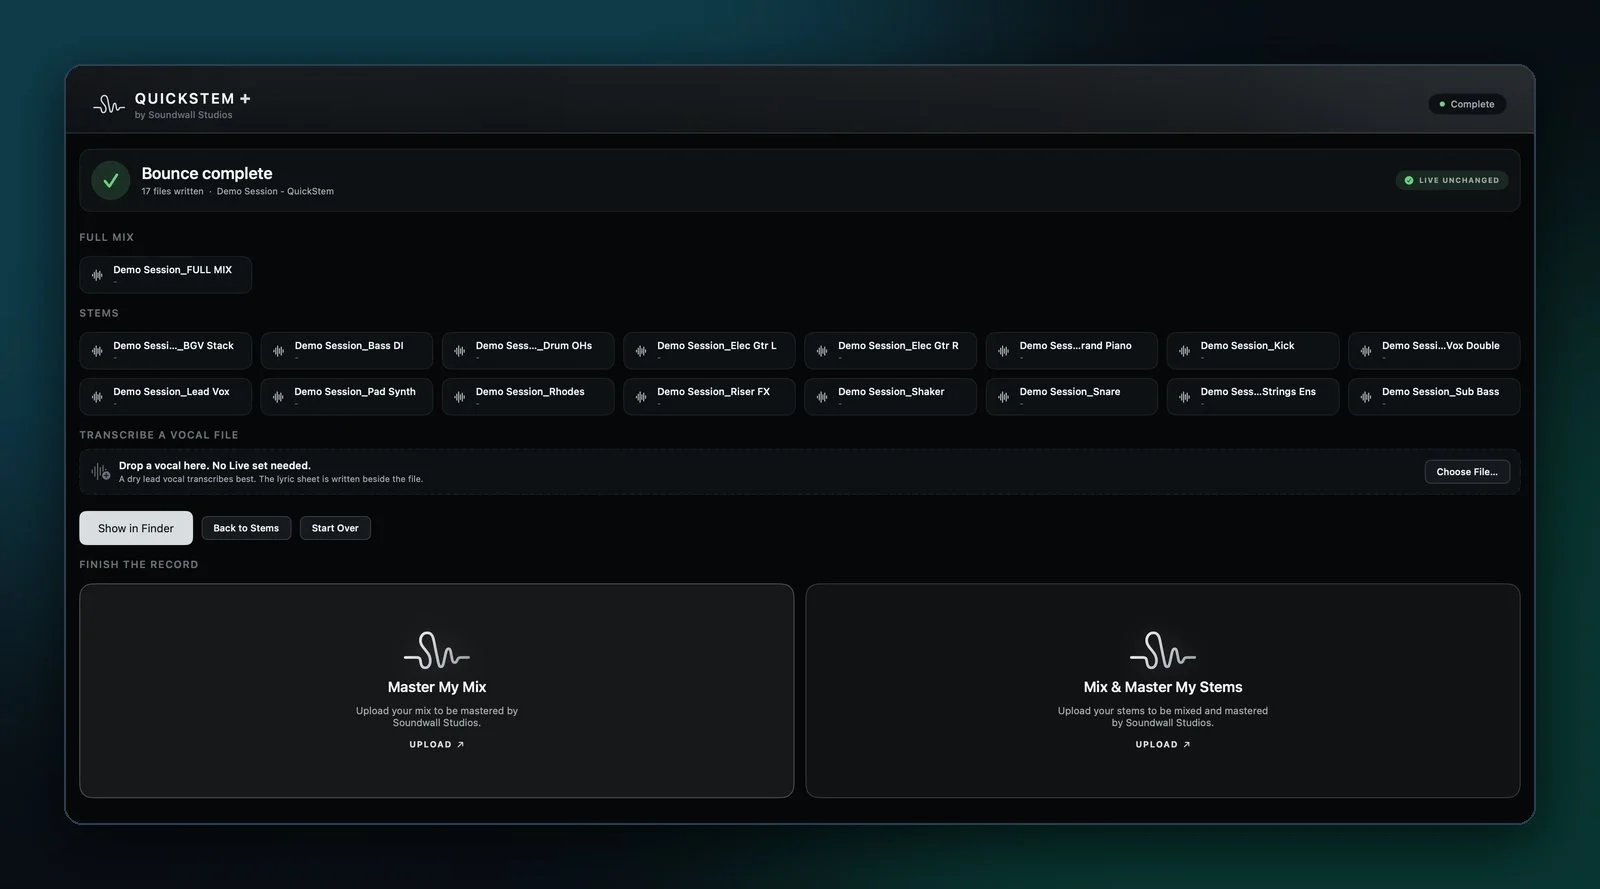
Done.
LIVE UNCHANGED means every solo, mute and device is back where it was. Every file starts at the same point and is the same length, so they line up at bar 1. Each delivery also gets a README with the tempo, key and sections.
Need a hand?
We'll get you sorted
If anything isn't right, send us a report: in QuickStem, choose Export Diagnostics, then email the file to support@soundwallstudios.com with a line about what you were doing. The full handbook for your DAW is in the app under the Help menu.
QuickStem 1.1 · Soundwall Studios · Westlake Village, California